Aquarium Equipment
CO2 System Setup Guide: Five Essential Components for Planted Aquariums
A practical breakdown of the five key components needed to set up a CO2 system: regulator, bottle, diffuser, pH checker, and extras.
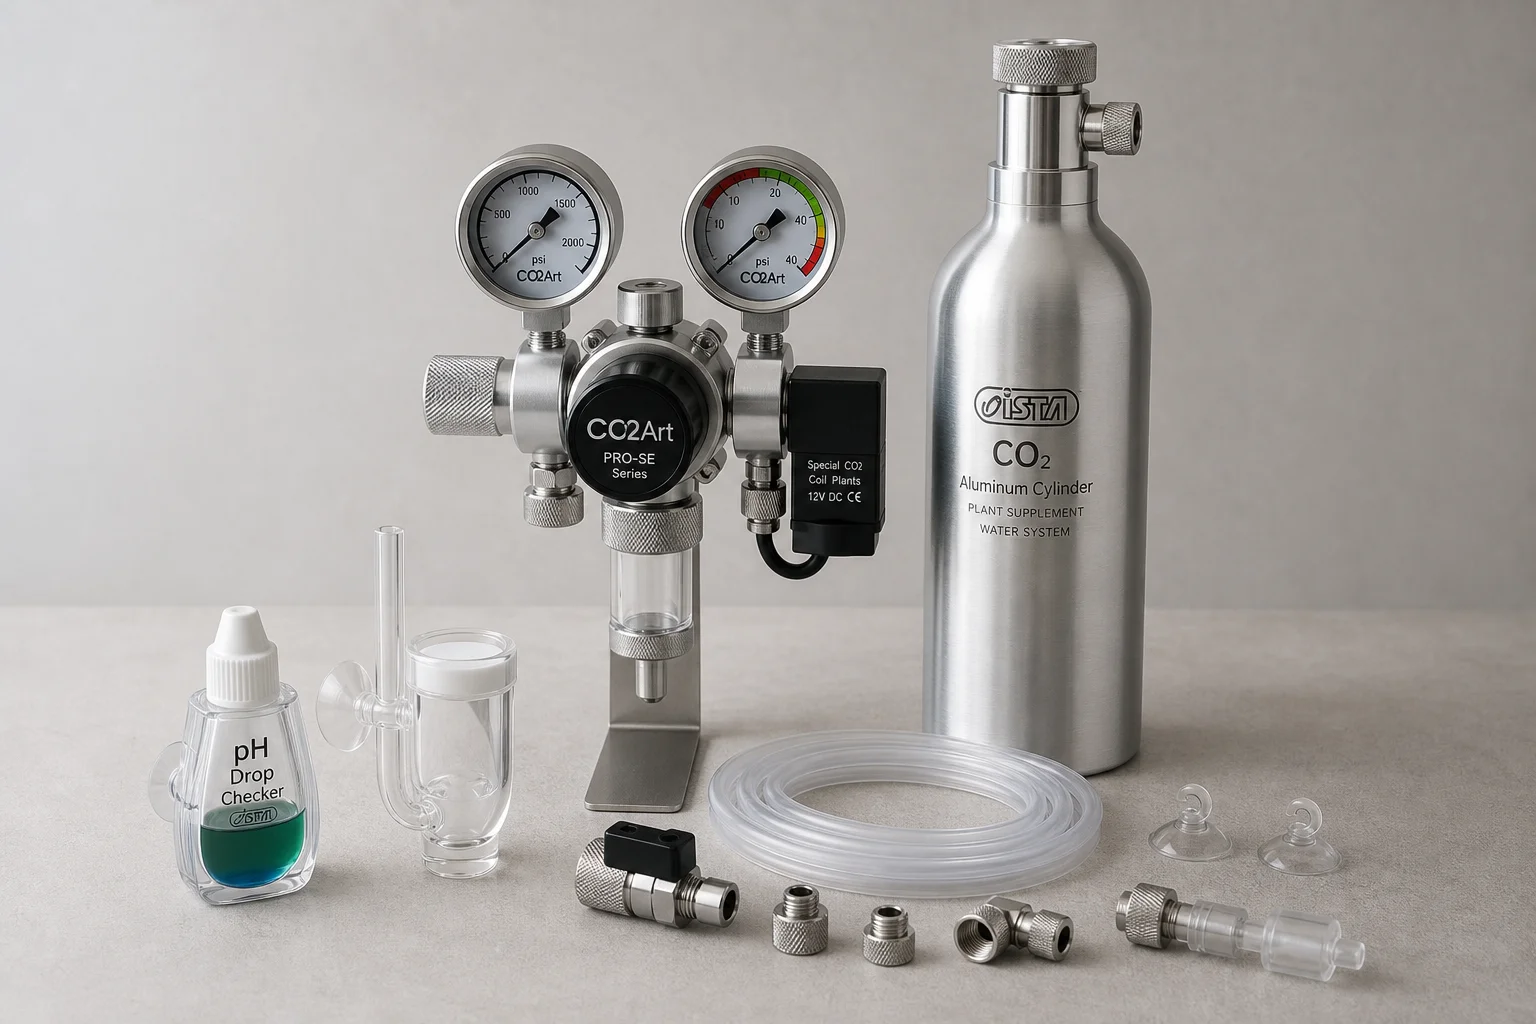
Introduction
Setting up a CO2 system for a planted aquarium doesn’t have to be overwhelming. Whether you’re starting with a nano tank or a larger setup, the process breaks down into five straightforward steps. Understanding each component and how it works will help you choose the right equipment for your specific needs and ensure your plants thrive.
Step 1: Choose a CO2 Regulator
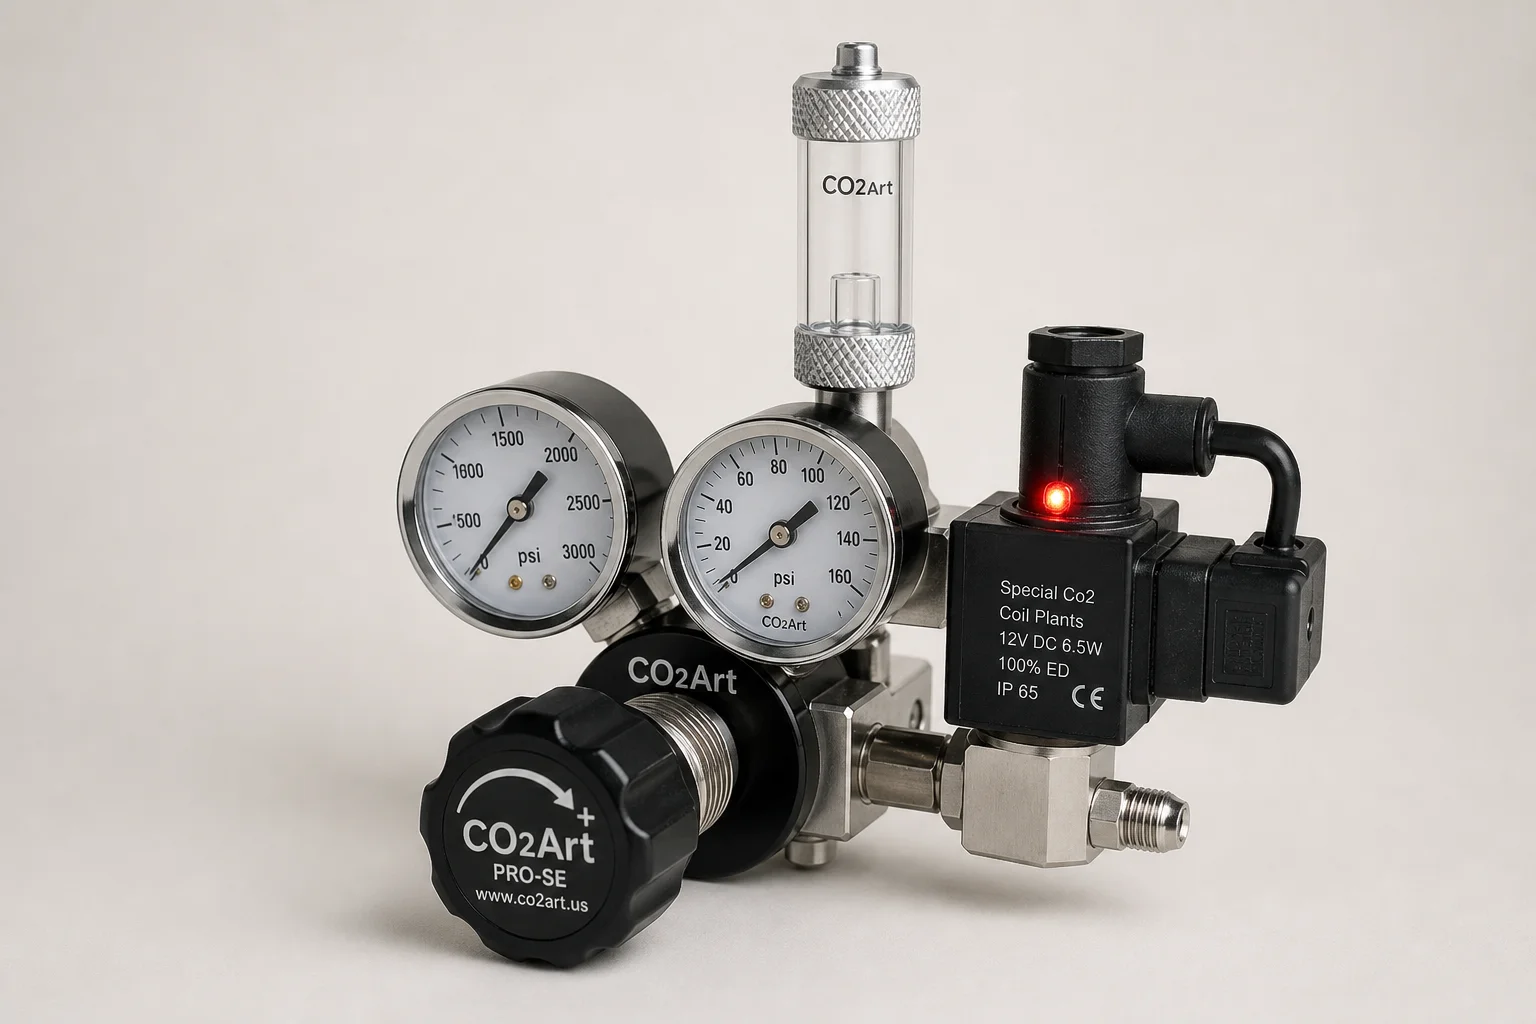
The regulator is the control centre of your CO2 system. A quality regulator like the CO2Art model is designed to manage gas pressure safely and precisely. The regulator features two gauges: the first measures the pressure inside the bottle itself, while the second shows the pressure in the line running to your aquarium. A twist knob at the front lets you adjust the line pressure to your desired level.
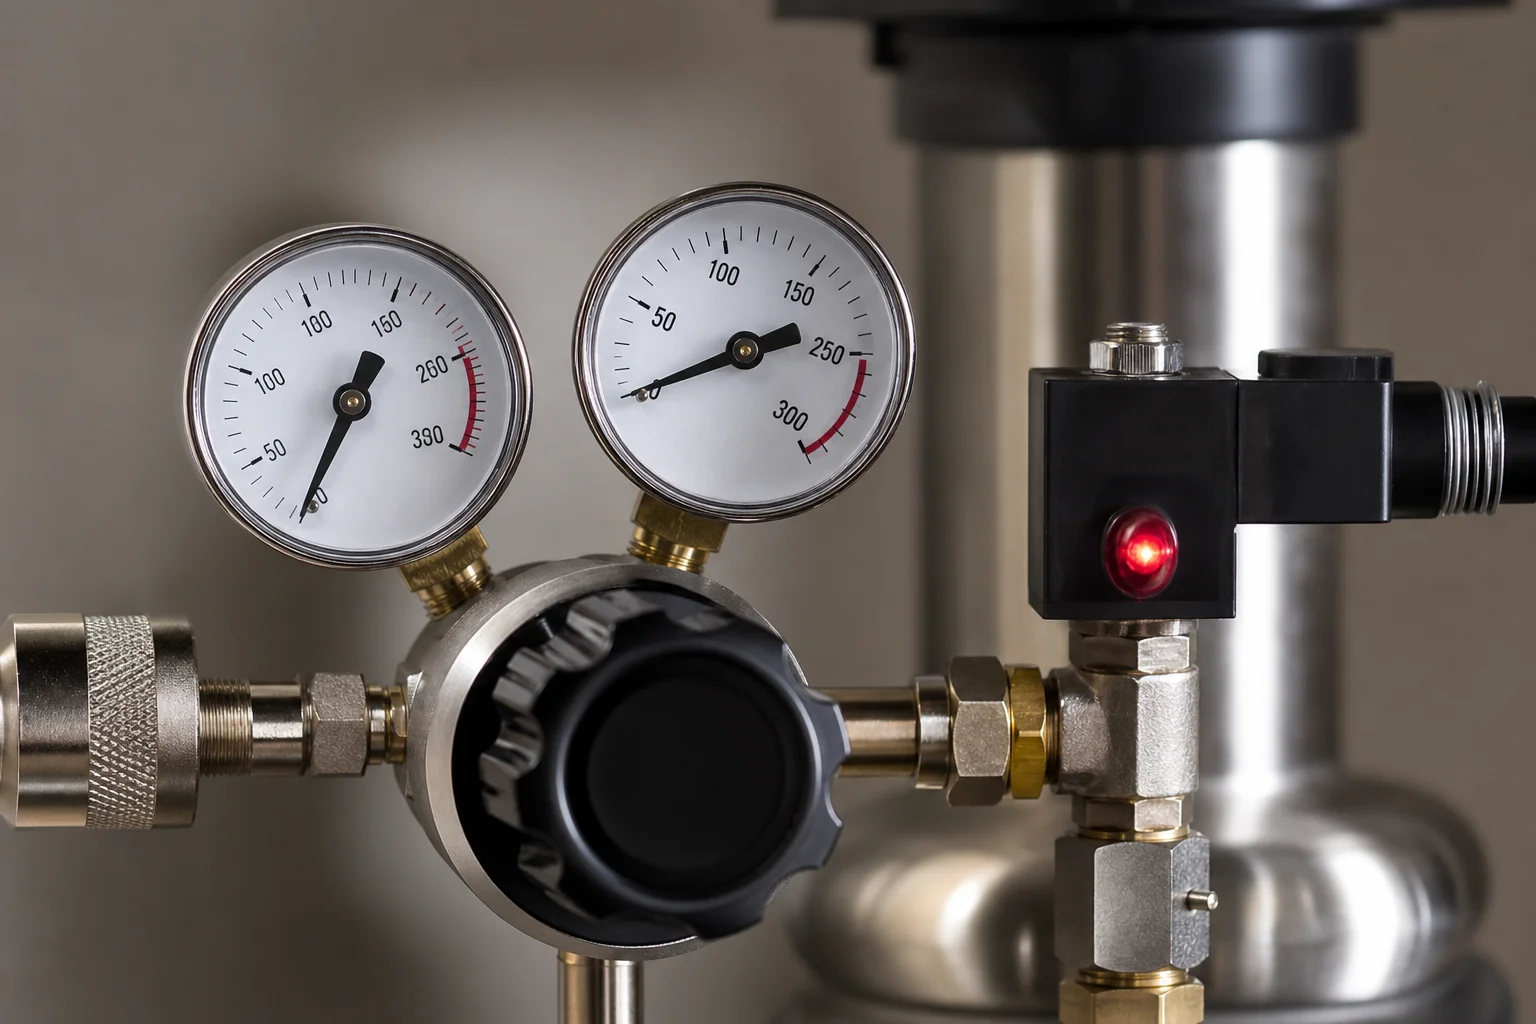
The solenoid valve is an important safety feature. When the red light is on, the gate valve opens and CO2 flows into your system. When the light is off, the valve closes and flow stops. Below the solenoid sits the needle valve, which fine-tunes exactly how much CO2 enters the aquarium. A bubble counter sits on top of the needle valve and fills with water, allowing you to visually gauge the CO2 flow rate entering your tank. This visual feedback is essential for maintaining consistent dosing.
Step 2: Select a CO2 Bottle
CO2 bottles come in various sizes and styles to suit different setups and aesthetic preferences. The Ista CO2 bottle range offers both top-mounted and side-mounted options with a polished aluminium finish and clear coating, making them attractive enough to display as part of your aquarium setup. These bottles complement glass stands, garden stands, and metal stands well.
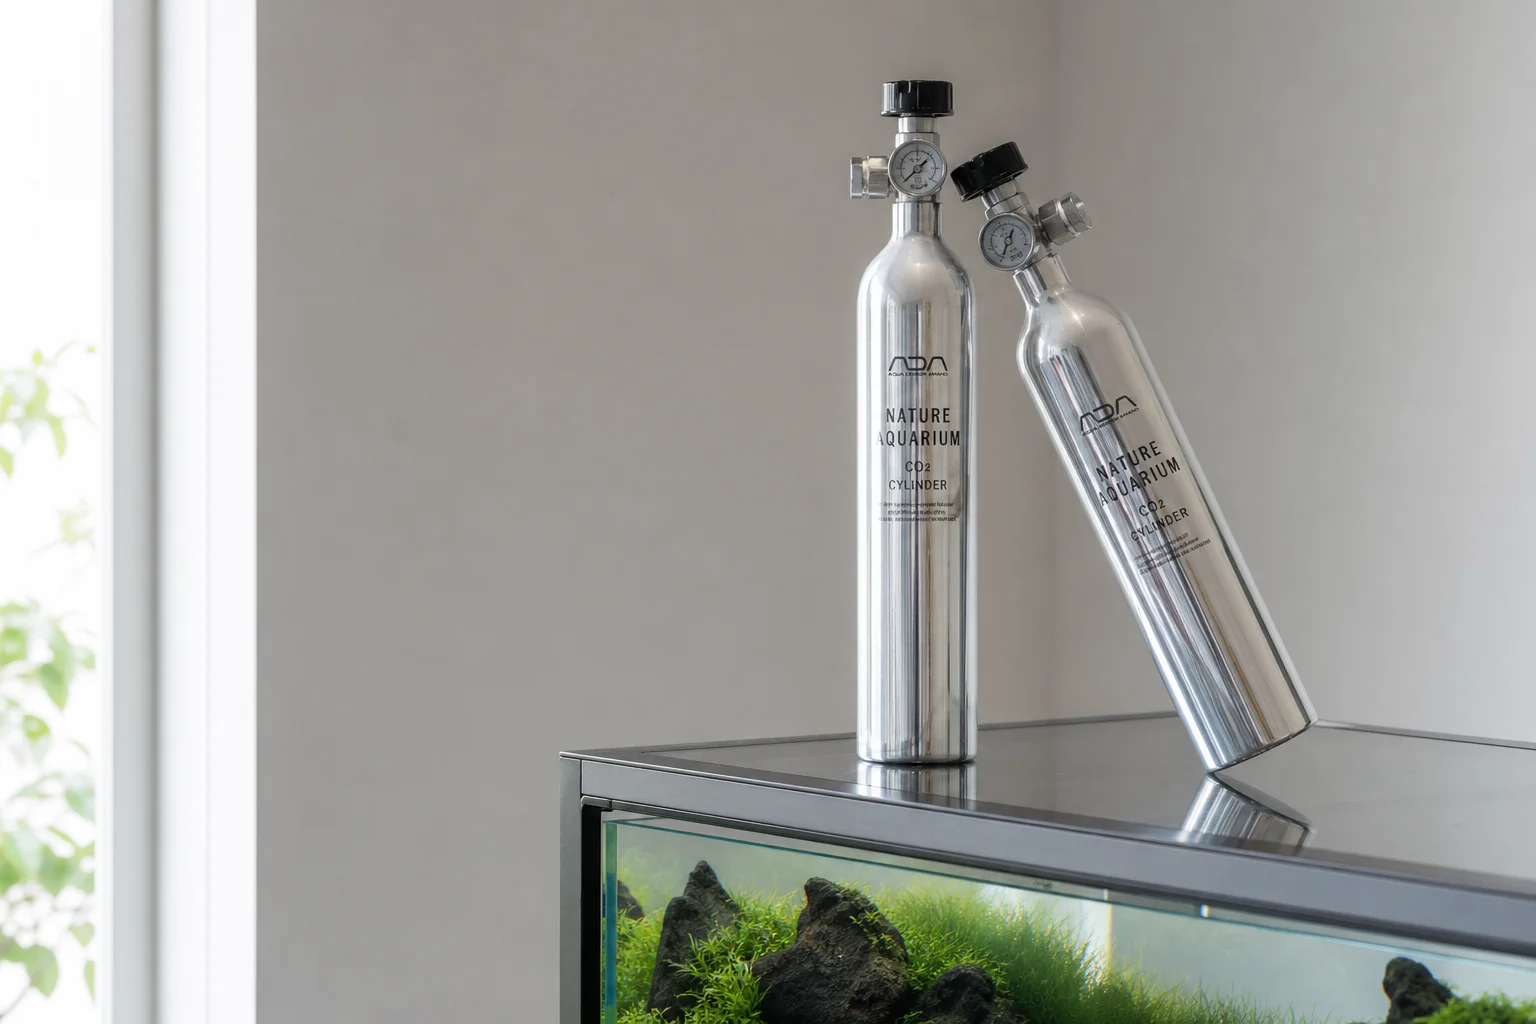
If your CO2 system will be hidden inside a cabinet, a grey steel swap bottle serves the same function without the premium finish. The choice between a display bottle and a utility bottle depends entirely on whether your system is visible or concealed. Both perform identically in terms of gas storage and delivery.

For those wanting the best of both worlds, the ADA Tower offers a decorative sleeve that slides over a standard CO2 cylinder, allowing you to maintain an attractive appearance without investing in a premium bottle.

Step 3: Pick a Diffuser Type
Diffusers are where CO2 gas dissolves into your aquarium water, and the choice depends on your tank size and personal preference. For nano aquariums up to 60 centimetres, an in-tank diffuser is recommended. These come in glass, plastic, or steel options, each with different maintenance requirements and longevity.
Glass diffusers offer a refined look and can last for years with proper care, but they are delicate and can break if mishandled. Plastic diffusers provide a similar appearance to glass but tend to scratch and wear over time. Steel diffusers require minimal maintenance apart from periodic replacement of the internal disc.
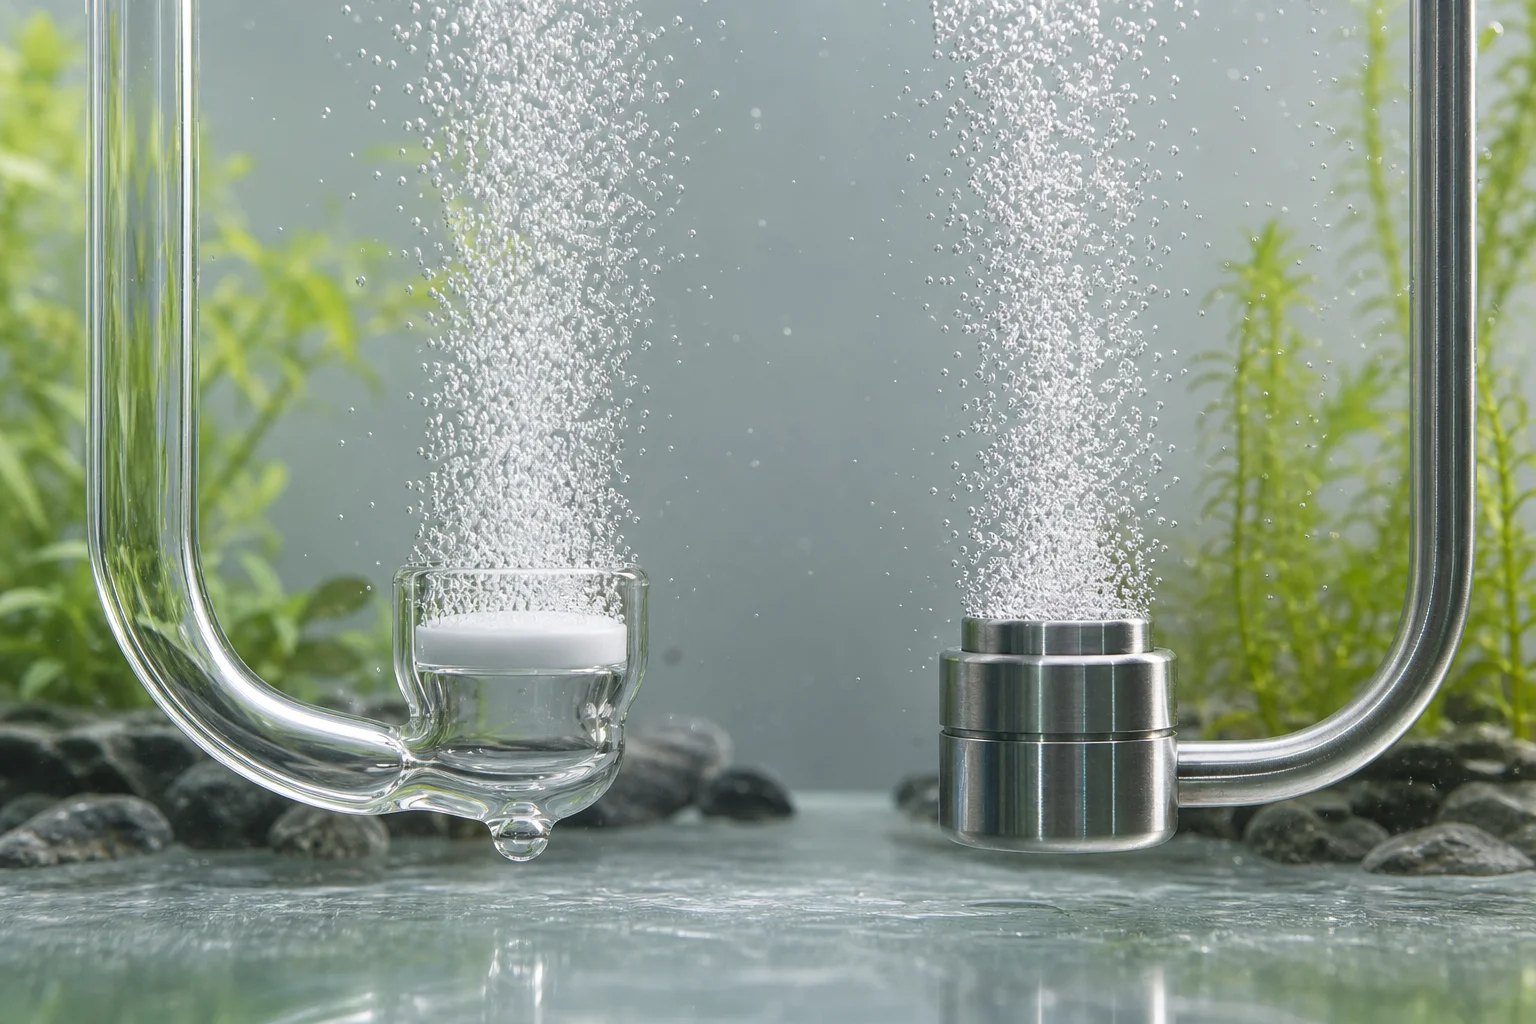
In-line diffusers integrate into your filter return tubing, dissolving CO2 as water flows through. Many aquarists report better dissolution rates with in-line models, though this is debated. One practical consideration: if your aquarium has a black background, in-line diffusers can create visible micro-bubbles throughout the tank. In such cases, stick with an in-tank diffuser for a cleaner appearance.
Step 4: Monitor with a pH Checker
pH checkers, also called drop checkers, are essential for monitoring your CO2 levels and ensuring a safe environment for your plants and fish. These simple devices hold a pH indicator solution that changes colour based on the CO2 concentration in your tank. The colour scale is straightforward: blue indicates insufficient CO2, yellow means too much, and lime green is the ideal target range.
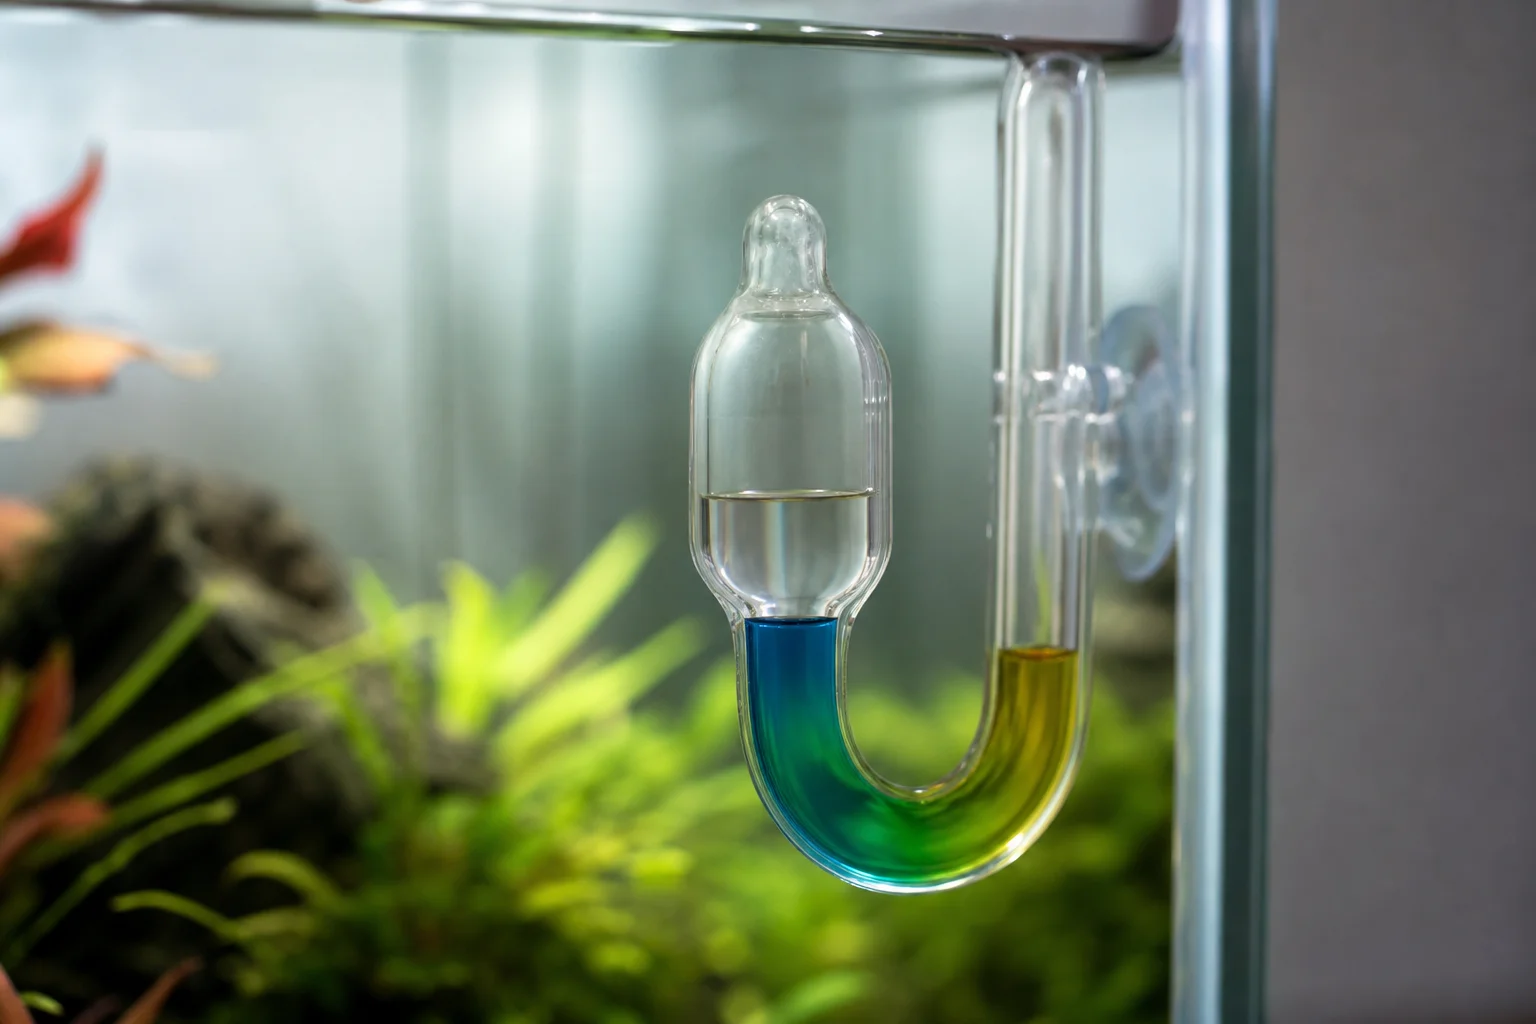
Checking your pH regularly helps you fine-tune your needle valve adjustment and prevents dangerous CO2 spikes or deficiencies. This is one of the most important safety tools in any CO2 system.
Step 5: Don’t Forget the Extras
Several small components round out a complete CO2 system. Non-return valves prevent water from flowing back into the regulator and bottle when your system shuts off, protecting your equipment from damage. CO2-specific tubing is essential; standard airline tubing will degrade quickly when exposed to CO2 and should never be used as a substitute.
Suction cups and fixtures keep tubing and diffusers positioned correctly and neatly. T-pieces, Y-pieces, and straight connectors allow you to split CO2 flow to multiple diffusers or sections of your tank. These small fittings make the difference between a tidy, professional-looking setup and a tangled mess of tubing.
Conclusion
A well-planned CO2 system starts with understanding each of the five core components: a reliable regulator, an appropriately sized bottle, a diffuser suited to your tank, a pH checker for monitoring, and the small extras that keep everything running smoothly. Taking time to select quality components and match them to your specific aquarium will result in a system that is both effective and enjoyable to maintain.
Further reading
Related Reviews
Aquarium Equipment
Adaptive Reef Neptune Systems Custom Control Board Review: Purpose-Built Organization for Apex Systems
A pre-configured controller board designed specifically for Neptune Systems Apex setups, offering integrated cable management, tablet mounting, and RGB lighting in a ready-to-use package.
Aquarium Equipment
Aqua Ultraviolet Advantage Hang-On UV Sterilizer: 8-Watt vs 15-Watt Guide
Two compact UV sterilizers designed for aquarium owners seeking parasite and algae control without complex plumbing or large footprints.
Aquarium Equipment
Best Aquarium CO2 Systems: Five Options From Budget DIY to Multi-Tank Setups
A practical guide to five aquarium CO2 systems, from homemade fermentation kits to pressurized cylinders with multi-tank regulators. Find the right setup for your tank size and budget.